
Traditional composting of yard clippings and kitchen scraps is not for everyone. Some gardeners just don’t have the space for composting bins but would love to have the “black gold” plant food that composting provides. If you want to try composting on a smaller, more concentrated level, worm composting (or vermicomposting) might be the answer.
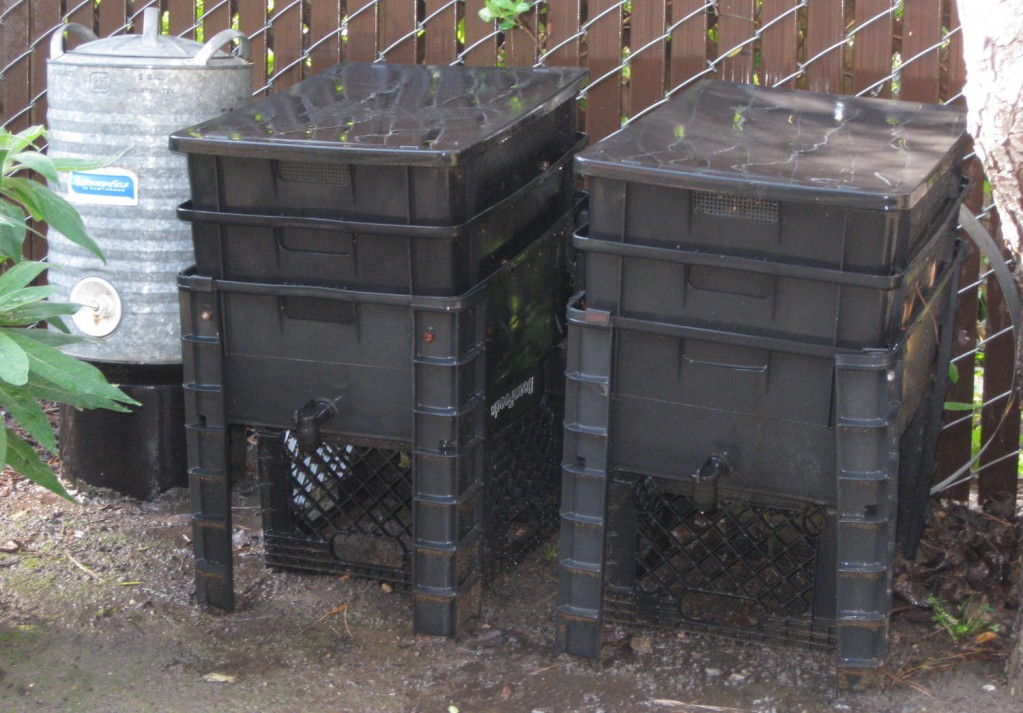
Your Worm Bin – Commercial worm bins are available but to begin your worm composting you might want to purchase a simple 10 gallon plastic tub with a lid that snaps shut. Worms like darkness, so an opaque bin is best. Drill 1/4-inch holes around the bin about 4 inches down from the top and 2 to 4 inches apart. Drill a few holes in the bottom for drainage. Place the bin on a tray to catch drips.
Worms thrive in temperatures between 55 and 75 degrees. Options for bin locations are the garage, basement, a shady deck or area in your garden, or in a garden shed.

Worm Bedding – In their natural habitat, “Red Wigglers” live in piles of fallen leaves above the soil surface. The best bedding in your bin is shredded rough paper such as black and white newsprint or cardboard. Prepare your worm bedding by wetting the paper and wringing it or drain it until is like a wrung-out sponge. Separate the damp strips. Add a handful of fine sand for grit to help your worms digest the bin contents.
Worm Food – A pound of red worms can digest several pounds of scraps each week. They eat just about any part of fruits and vegetables, coffee grounds and filters, tea bags and breads and cereals. To begin, layer about a pound of scraps over the bedding. Avoid putting meat, oils, cat or dog feces, or dairy products in your bin. While worms can survive longer without food, they enjoy a weekly feeding.
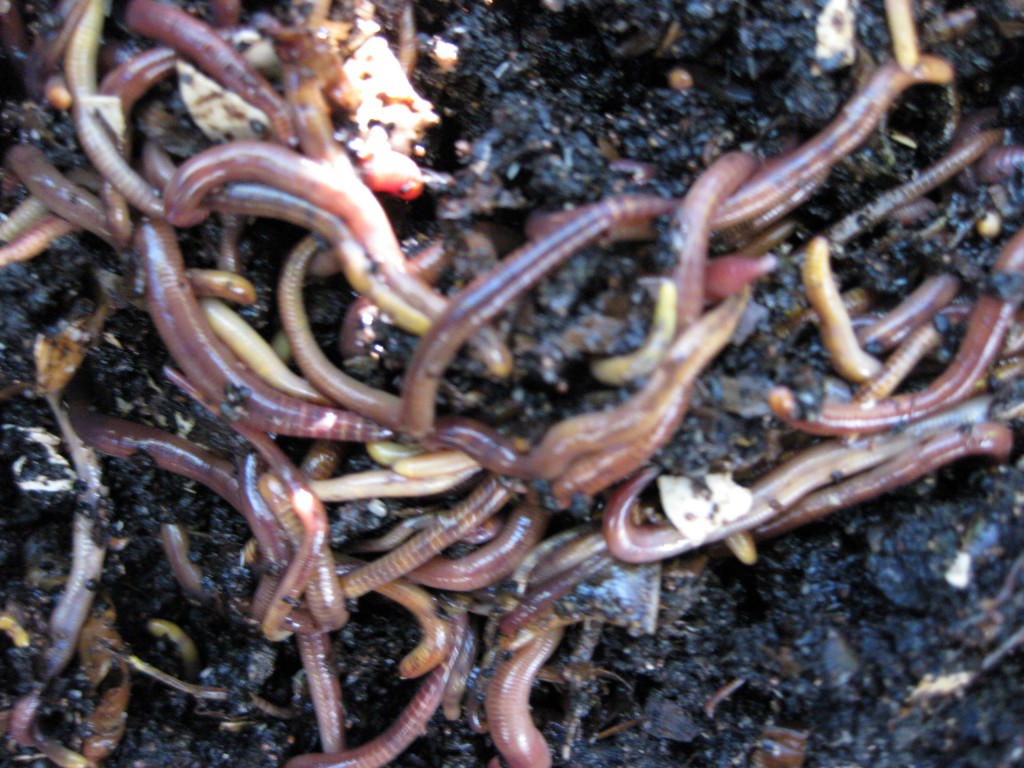
The Worm Crew – “Red Wigglers” (Eisenia foetida) can be purchased at garden centers, bait shops or from suppliers on the internet. You will need less that a half-pound of worms to begin your worm composting. Worms need to be separated from their casting about twice a year. One method for separation is to push the decomposed material to one side of the bin and remake the worm bed with paper and kitchen scraps. Worms will eventually migrate to the freshly filled side of the bin leaving you with fresh compost.
Another method for those of us who can’t wait for the wigglers to meander to “greener” pastures so that castings can be harvested, is to expose the open bin to bright light or sunlight. The worms will dive for darker quarters. After a few minutes, remove the top inch (sans worms) and repeat.

Your Payoff – Worm compost is ready to use when all vegetation has been digested. You can sprinkle and dig it into freshly cultivated soil or mix one part worm compost to four parts potting mix. Putting compost in a cloth or cheesecloth bag and soaking it in water for 24 hours makes a rich compost “tea”. Use the tea to water your plants.
Thanks for the advice, Lee. I have a lot to learn about compost.